Kitchen Adventures

Many uses for whey

So you decided to try out making cheese or yogurt for the first time. Now you have a disappointing amount of your desired product, and an alarming amount of whey byproduct. Fear not, whey is so useful, that industrial production of this once waste product has surpassed production of actual cheese!

A word of warning, whey contains a concentrated amount of the substances that cause dairy and lactose allergies/intolerances.

Nutrition

Most of the fats and proteins have been removed from the whey when the solids were extracted for cheese/yogurt. While the remaining nutrition is mostly sugars, the vitamins and minerals are valuable. A cup of weight contains 60 calories, 13 grams of carbohydrates and numerous micronutrients (source).

Ways I’ve used Whey

Yogurt whey is fermented thus packed with the probiotics that many people (including myself) pay good money for. I drink a few ounces of whey when I wake up in the morning on an empty stomach. It has a weird combination of savory with an acidic tartness that I’ve acquired a taste for…likely from my love of sour beers and kombucha. Expect the same effects as probiotics…especially if you are relatively new to the scene! Mozzarella whey is not biologically active however if I am running low on yogurt whey, I will inoculate the former with the latter.

While cheese whey lacks the good microbes of yogurt whey, it is still full of nutrition. Furthermore it’s acidic properties pull great amounts of calcium, collagen and flavor from animal parts when used as the base in a stock (my observation, no scientific basis). Before I discovered whey, I used a vinegar water base to try and achieve the same effect. With the boost in nutrition comes a boost in calories as well that should be accounted for. I usually wake up with yogurt whey and go to bed with whey-based bone broth.

Similarly, when I still ate bread nothing was better than a loaf of sourdough with the the water replaced by whey. I can’t even describe the change in flavor but it was irresistible. If I could comfortably digest the products of baking, I would be trying whey in everything!

Seeing as protein is the most expensive food source for any creature, I have fed whey to livestock as well as pets. Fair warning, introduce whey slowly and incrementally into an animal’s diet to prevent having some loose messes to clean.

As a last resort, whey can be added to the compost pile or to the soil as an acidifying fertilizinger. If you have neither compost nor acid-loving plants, find someone with a compost pile or who grows blueberries or tomatoes!

Ways I want to use whey

Whey reduced the occurrence and rate of progress of powdery mildew in squash and cucumber plants (source). It seems weekly applications of 25% whey are the most effective, but more research is needed for exact timing and quantity determinations. I may try it on my grapes for the intended purpose and to see if there is any effect on the devastating japanese beetle populations.

Next time you make yogurt or cheese, smell your hands a few hours later. They will smell like those expensive cosmetics made with lanolin. In fact the smell is such an exact match, I would not be surprised is news broke that these products were being falsely advertised. Next batch of soap that I make, I will add some whey!

I’ve come across quite a few recipes for whey-based beverages ranging from simple, refreshing lemonade to creative cocktails. Citrus flavors and whey would be symbiotically complimentary in my opinion so I am going to try them out! I will surely report back.

Lastly, I am inexplicably eager to try out fermenting food. Everything from mayo, to krauts and kimchi to salsa to anything that can be brined or pickled is on the radar. Whey is known to kickstart those processes but I’ve read some foods are better suited for whey inoculation than others. Until I can report back with real experience, I have to defer this subject to your own research.

Conclusion

These are the options I’ve encountered or researched but I am sure there are many more. Putting whey down the drain is a water pollutant and a waste of a good resource so I hope you can find a way to put it to use!
Standard
Kitchen Adventures

Easy Mozzarella Cheese Recipe (Expanded version)

Making mozzarella cheese at home is easy but time-consuming. One batch takes about 2 hours and yields 13 oz of cheese per gallon of milk which for me, is 13- 85 calorie servings.

Followup to the bare bones recipe posted yesterday.

Tools Required:

  • Pot to hold 1 gallon of high fat milk
  • Thermometer (affiliate link)
  • Measuring cups and teaspoons
  • stirring instrument like a whisk or fork
  • plate to hold curds between steps
  • Latex or similar gloves to provide a minute heat barrier
  • Ladle for dunking curds in the whey (I use a 1 cup measuring cup)

Materials Required:

  • Time – 2 hours active, 0 hours passive
  • 1 gallon of high fat milk
  • 1/8 teaspoon liquid rennet (can use other types, just follow the directions on the box) Affiliate link
  • ~2 teaspoons of sea salt
  • 1 teaspoon acid to get milk to curdle. Affiliate links: small, economically large (I use it in DIY dishwasher detergent)

Procedure:

  1. Pour milk into crock pot or regular pot and slowly heat milk to 55 degrees Fahrenheit (13 C)
  2. While milk is heating, stir the acid into a bit room temp water- just enough to dissolve the acid.
  3. When the milk is 55 degrees, stir in the acid solution then continue heating.
  4. While milk and acid is heating, dissolve the rennet in the same manner as the acid
  5. When the milk reaches 88 degrees Fahrenheit (31 C) then stir in the rennet.
    1. Do not stir any more after this point!
  6. Slowly heat to 110 degrees (43 C) then hold the temperature until the curds pull to the middle leaving clear whey around the sides.
  7. Scoop out and drain the curds while heating the remaining whey to about 175 degrees (80 C).
  8. Aggregate the curds into a few groups, then dunk and hold in the hot whey kneading between dunks.
    1. The dunking and kneading is to raise the entire curd to the right temperature which is too hot to handle.
    2. Don latex gloves for kneading.
  9. Once the cheese is almost done, add a few teaspoons of salt to the whey.
  10. Repeat dunking until the cheese is smooth and stretches like taffy.
    1. It can now be rolled and cut/twisted or balled or however you wish to store it.
    2. If it starts breaking instead of stretching, just redunk to warm it back up
  11. Eat, refrigerate for up to 2 weeks or freeze the finished cheese.


Pictures:

20160410_151911

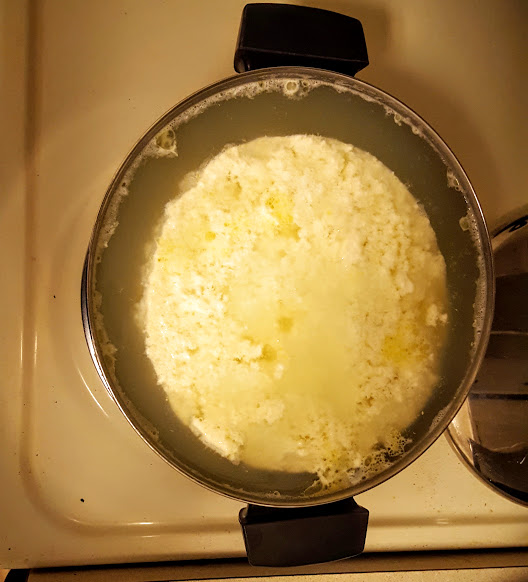
Curds are fully separated from the whey

20160410_152111

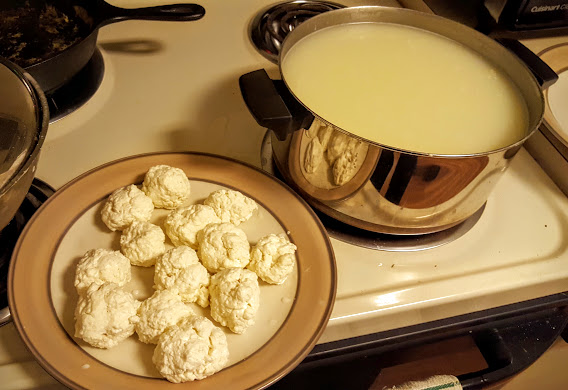
Collecting the curds and straining the whey. Cheese is starting to reveal itself!

20160410_154322

First round of dunking the irregular, lumpy curds into the hot whey

20160410_162603

Ready for the final dunking. As the curds turn to cheese demonstrated by their smoothness, I consolidate them into the storage size. I also keep a little sample set aside for immediate eating.

20160410_162718

Final amount of cheese from 1 gallon of milk. Side note: I adore and fully endorse this scale (affiliate link)

Yes, that’s right…1 gallon of milk only yields 13 oz. of cheese. It takes less time overall but a lot more work than yogurt and the result is a biologically inactive product. Although I love cheese, the roughly 3/4 gallon of whey that remains is my try goal. I mostly use it in to make stock in combination with animal bones, or inoculate it with yogurt whey to replace my $60/month probiotic. Luckily the whey is so useful, the once waste bi-product of cheese making has overtaken industrial production of the valuable cheese itself. I’ll explain more ways to utilize whey tomorrow!

If you possess a greater amount of patience than me, you can keep the curds warm to roll, stretch, twist, cut, etc. your way into beautifully presentable cheese. When I use mozzarella, it is to grate for pizza/pasta type dishes or rip chunks off to stuff under fish or fowl skin before baking. So I don’t put much effort into presentation. It is however rich and delicious but you will likely need to play with the salt levels in the dunking whey to nail your desired levels.

Standard
Kitchen Adventures

Easy Mozzarella Cheese DIY (simplified recipe)

The process to make mozzarella cheese is so simple but a bit time consuming. This recipe assumes 1 gallon of milk with 1 teaspoon of citric acid and 1/8 teaspoon rennet, both diluted in a small amount of water.

  1. Heat milk to 55 degrees Fahrenheit (13 C) then stir in an acid.
  2. Slowly heat to 88 degrees Fahrenheit (31 C) then stir in the rennet.
  3. Slowly heat to 110 degrees (43 C) then hold the temperature leaving the pot unstirred until the curds pull to the middle leaving clear whey around the sides.
  4. Scoop out and drain the curds while heating the remaining whey to about 175 degrees (80 C).
  5. Aggregate the curds into a few groups, then dunk and hold in the hot whey kneading between dunks.
  6. Once the cheese is almost done, add a few teaspoons of salt to the whey.
  7. Repeat dunking until the cheese is smooth and stretches like taffy.
  8. Eat, refrigerate for up to 2 weeks or freeze the finished cheese.

Don’t discard the whey! I’m working on a post to describe all the uses for this nutritious and versatile substance! I will also post a more detailed recipe tomorrow but I know some readers appreciate concise DIY posts. Enjoy!


Standard