Bees

First Spring Check on the Beehives Coming Out of Winter

Last weekend it was reasonably nice with temperatures creeping into the 60s with gusty winds. It was not the ideal time to check on the bees, but it was close enough and aligned with a break in my schedule.

I didn’t plan on doing a full inspection just yet but I did plan to get in enough to make sure the hives were even still alive. As a first year beekeeper without a mentor, I certainly did everything I read and gleaned from forums to ensure winter survival. Yet being realistic…I wasn’t sure it was enough.

The weaker hive from last year had about 14 frames of stores going into winter where the stronger hive had 18. I left each hive a half pound of sugar atop newspaper on top of the frames to provide winter snacks. Others use fondant or sugar cakes which I find to be an unnecessary use of time and energy. All forms of dry sugar are consumed by bees solely for immediate nourishment whether it is plain old granulated sugar or if it been processed into something else.

This “weak” hive was literally buzzing with activity as I approached. Upon opening the hive, most of the sugar remained untouched by the bees. However a few small hive beetles scurried from the light. In large numbers in a weak hive, these beetles could be a problem. Otherwise a healthy colony will deal with them just fine on their own. The main cluster of bees was spread across the bottom half of 3 frames in the upper super. No cause of concern was found so I moved onto the next hive.

My “stronger” hive was alarming even from a distance. No bees were flying in or out and there was not a single guard out front. Opening the hive caused nothing in the way of the anticipated buzzing sound and revealed entirely consumed sugar that was left for winter snacking. Uh-oh!

Turned out the bees were just cold which makes sense as the siting of this hive does provide much early day spring sun. The cluster was small and confined to either side of a single frame. My strong hive, while alive and seemingly happy, has fallen behind the previously weaker hive!

All that was done to either colony was adding the hive top feeder with 2 gallons of syrup and removal of the insulating hive wrap. Next chance I get I will return to remove the entrance reducers which I held off due to the weather forecast. Today strong gusts, snow flurries and near freezing temperatures shows that was a good decision, and if any syrup remains unconsumed, the decision to feed might not have been a good one.

Now my main concern is catching the building of queen cells, and spliting those frames to a Nuc the day that the bees cap those cells all in an attempt to simulate swarming. Time to buy and paint some nuc hives!

Standard
Bees

DIY: $9.33 Insulating Hive Wrap for wintering honeybees

Wrapping the hive for winter is likely not necessary in my region. However everything on a farm boils down to energy management: less energy spent on keeping the cluster warm over winter translates into less energy consumption. This both extends the winter resources as well as lessens honey consumption. The latter point translates into more honey remaining in the spring, thus less need to refill the frames consumed over winter, thus allowing the bees to start storing excess honey sooner, thus increasing the harvest of the following year.

Total price tally (from amazon for universal considerations):

($17 for insulation + $11 for velcro) / 3 hive wraps can be made from these materials = $9.33 per wrap

First of all, I did not take very good pictures of the process so hopefully I can describe the process adequately with words. Secondly, I realize this post is late as I never got it written before I took my break in the fall. Third, as with all of my beekeeping posts [so far] I use 10 frame langstroth hives.

Tools Needed:

  • String or something to measure (tailor’s tape, etc)
  • Scissors
  • Empty hive body (can be any size, we are just after the outer perimeter measurement)
  • Rubbing alcohol and a rag for cleaning

Materials Needed:

  • Reflective Bubble Insulation (Affiliate link) 16″ wide by 25 feet (enough for 3 hives of 2 deep supers each) ($16.25 at time of writing)
  • Industrial Velcro, (Affiliate link) 2″ wide by 4 feet (enough for 2.75 hive wraps but see notes below) (I bought mine at walmart for $8 if I remember correctly but use that link as a reference to the exact product but save some money getting it locally) ($11)

IMG_20151102_133006

Procedure:

  1. Use the string to measure the outside of your hive body
    1. My hive bodies are 19-7/8″x16-5/8″ for a total parameter of 73.5″
    2. My actual measurement was just over 74″
    3. I like to compare the measurement to the expected perimeter calculation based off of factory measurements for extra assurance but this is likely not necessary
  2. Add 2 inches to the parameter total to accommodate the overlap needed for velcro
  3. Cut the insulating material to length
  4. Clean the last two inches along opposing edges with alcohol and a rag to ensure adhesive sticks well
  5. Apply velcro to OPPOSING FACES ON OPPOSING ENDS so the velco will align when wrapped around the hive
    1. for clarity: imagine the insulating wrap is a piece of paper. Put on strip of velcro on the top of the front of the page. Put the opposing strip on the bottom of the back of the page.
    2. ALSO BE SURE TO use the two different types of velcro at either of the two ends the loop velcro can catch the fuzzy velcro
  6. Apply to hives!

Picture of the finished product:

IMG_20151112_103626

Oops! On my original design I forgot to account for the overlap needed for the velcro to grab its opposing self so the insulation is cut to the exact perimeter of my supers. Which brings me to my next point.

Notes

This velcro is incredibly strong. After 2 months of use, the maximum of 1/4″ overlap I could barely stretch out of it has held the hive wraps in place without a single issue. I’m actually worried about being able to get the wrap off in the spring had I provided a full 2″ of overlap. After all, its advertised to hold fire extinguishers to the wall! I was also originally planning to reinforce the adhesion to the wrap by stitching the velcro in place. I decided not to for 2 reasons:

  1. The insulation is like unpoppable bubble wrap used as a packing material so stitching through it would have ruined the insulating air pocket under the strips of velcro
  2. After playing with the velcro, I decided it was unnecessary. Ok Ok…I actually dropped the velcro and almost destroyed the carpet trying to detach them from each other. If the adhesion wears out down the road, you all will be the first to know!

Insulation power:

The insulating wrap I linked to has a extremely low insulation value: R=1.04 which is roughly equivalent to 1 inch of solid wood, increased to 4 if a 3/4″ gap is made. That gap could be achieved by putting blocks of wood under each of the 8 corners but the work required was not worth it for me. Regardless, this current set up serves me fine as I doubt I even need insulation. If your location calls for more insulation, I would use many many many layers of this or use the age old method of hay bales (or both in combination) or leave snow piled up around the hive with the entrances clear for ventilation.

Dimensions:

I chose 16 inch insulation because overwintering, my hives are 2 deep supers: each 9-5/8″ tall or about 19″ total. The 3 inches of difference leaves the bottom entrances open for ventilation as well as the top entrance (although I keep that one plugged unless condensation becomes an issue). If you have a different hive configuration you will need to calculate or measure the required width and buy or cut the insulation to that figure.

Similarly, I use 10 frame deep supers so if your configuration is different you will need to calculate or measure the length requirement of the insulation. Don’t worry it is simple and discussed in steps 1-2 above.

Final thoughts

The setting sun can hit these hives and reflect off in blinding fashion that makes it look like the hives are on fire. If your apiary has a line of sight to a roadway or bee thieves are a valid concern, you may want cover the outside with an additional layer of fabric or paint. Also this makes me wonder if the wrap is causing the hives to lose that warmth but I feel that keeping in heat is more valuable than capturing it in the winter (although backed by no calculations).

Also after seeing how ferociously strong the velcro is, next time I am going to use only a few inches at each corner and maybe on in the middle instead of lining the entire length of the end of the insulation.

Lastly, I may build a collar of sorts for the hives out of scrap wood to give the insulation the 3/4″ gap that quadruples its insulating rating. It would be a simple wood frame that sits down over the hive to be wrapped instead of the hive itself.

Honestly with the low insulation this provides, the benefit is likely more psychological to the beekeeper than anything else. As bees are best left undisturbed over winter, it is a hard time for a keeper who is uncomfortable with taking a hands-off approach. This at least provides a piece of mind that the keeper is doing everything in her or his power to help the bees survive!

Standard
Bees

Bees finishing up their services for the year


At this time of year, the only remaining nectar producing plants are a few in the Asteraceae family and some straggling goldenrod.

IMG_20151016_141218

Gathering nectar/pollen to the bitter end of autumn is a good sign since I’ve stopped feeding liquid syrup for the year as temperatures at night have been dropping below freezing. I only have two more tasks to carry out before I’m forced to stand back and hope the bees have enough resources to get to the spring:

  • Pull the empty hivetop feeders, place some newspaper on top of the frames and pile some dry sugar. Moisture is an enemy within hive over winter, but so is wind penetration. A medium ground has to be carefully reached where condensation can be whisked away by limited airflow.
  • Sew together a hive wrap insulating blanket. I’ll post my cost-effective method for insulting winter hives once I’ve received my raw materials!

Wrapping the hive for winter is likely not necessary in my region. However everything on a farm boils down to energy management. The less energy spent on keeping the cluster warm over winter translates into less honey consumption. This both extends the winter resources as well as lessens honey consumption. The latter point translates into more honey remaining in the spring, thus less need to refill the frames consumed over winter, thus allowing the bees to start storing excess honey sooner, thus increasing the harvest of the following year.

Standard
Bees, Forestry, Silvopasture and Agroforestry, Wildlife

Farm overview of my favorite time of year: Fall

Fall has always been my absolute favorite time of year. If it were socially acceptable, I’d disappear into the mountains until the amazing holidays promised by that fall fell upon us.

The first signs of autumn are the “THUNK, THUD, THUD” that occur roughly every few minutes or so as the walnuts fall from the trees. Following a windy day, I can fill a 5 gallon bucket with walnuts in about 2 minutes. After removing the husks, they are used to tan deer capes ensuring minimal waste when I kill the animal. Similarly, most tree crops are harvested in the fall including most pome and stone fruits as well as almost all nuts. Fall is when my foraging skills are best utilized mostly because my knowledge of trees is much greater than that of fungi and herbaceous plants. Plus I can plant garlic, salad greens and my favorite brassicas into the garden.

Second, the morning cadence of sounds shifts. Instead of songbirds chirping their morning wake up alarm, migrating birds dominate with a more steady and droning rhythm that closely resembles the sound of rain falling on the metal roof. Every day this week I awoke thinking more rain was falling.

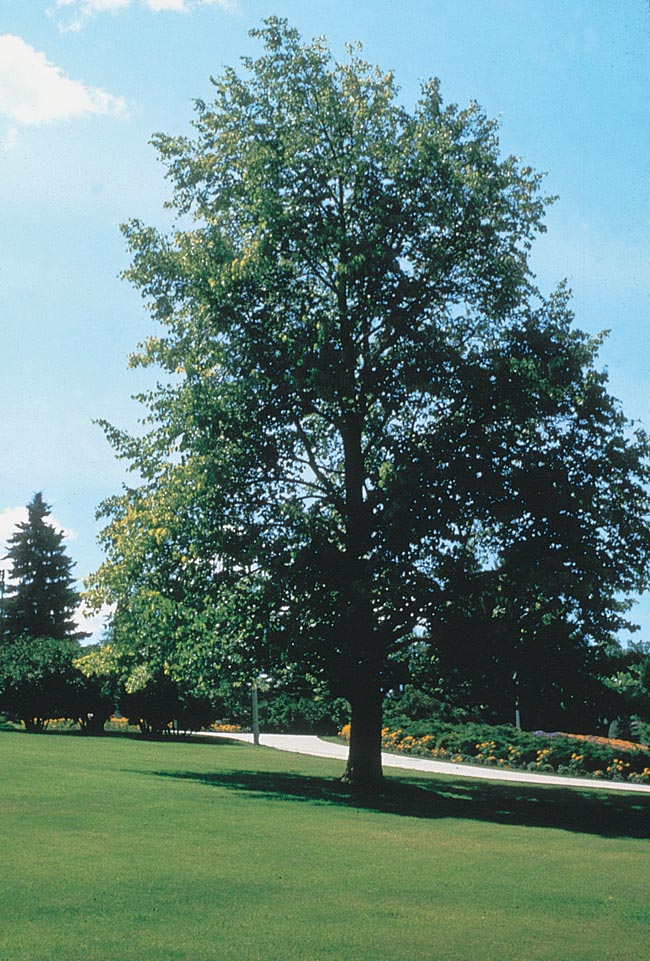
Thirdly comes the autumn favorite of everyone: vegetative changes as plants harvest back mobile nutrients in preparation to winter. Black gums and sourwoods seem to catch on fire turning a ruby red followed by similar colors in maples and viburnums. Walnuts then turn gold then lose their leaves all in one swift action. White ashes usually turn yellow with a few extraordinary specimens turning burgundy. Elms (well… hackberries in my case), birches, hickories and beeches turn a similar gold. Lastly, the oaks will turn a rich, deep burgundy that signals peak autumn color season. Similarly, the undergrowth and herbaceous plants die back for the year making outdoor adventures all the more fun and accessible.

Fourthly, fall seasonal beers are my favorite as long as some balanced specimens survive the craft scene’s gold rush to put out the most heavily spiced, bitter or over the top beers. Similarly, autumn contains my favorite holidays either celebrating harvest or appealing to my morbid curiosities.

Most favorably, bugs start dwindling! ***

Finally, If I had to pick a singular activity as my favorite, there is not a shred of doubt that it is deer hunting. Sourcing healthy and clean meat in a humane, sustainable manner is very important to me. Last year I reached 85% of my meat consumption sourced from white tailed deer. That figure of wild game consumption would be 100% if American Buffalo had not been extirpated from the region. Since that is the case, my cattle will fulfil the ecological niche of the extirpated Bison while chickens fill the niche of Buffalo Birds, now called cowbirds since there are no more buffalo. I personally fill the niche of controlling population numbers to ensure species survival/health formerly held by wolves and mountain lions; both of which have also been extirpated.

Bam… You just learned why I hunt and why I farm in one, uncharacteristically concise paragraph!

***I have to qualify the bugs statement after this year. Those in power in our society will never cease to amaze me at their sheer stupidity or stubbornness or greed in globalization that is destroying our natural resources. They haven’t learned from chestnut blight, dutch elm disease, emerald ash borer, thousand cankers disease, white pine blister rust, hemlock wooly adelgid, Ailanthus aka Tree of Heaven infestations, Royal Paulownia infestations, kudzu and wisteria infestations, Autumn Olive, asian citrus psyllid that could end citrus production in Florida, mimosa trees, japanese beetle, stinkbugs, avian flus and many many more.

Holy moley the bane of my existence is out in force this year: brown marmorated stink bugs. I get swarmed by these pests constantly while deer hunting. Last night I was drawing my bow on a mature buck when one landed on my nose and one on my thumb. I’ve even taken videos in my treestand of the pests with their thunderous and clumsy flying skills. I know they are harmless to my person and I even have zero fear of bugs with a fearsome reputation, but try to sit still and not startle a herd of deer when what sounds like a cargo plane [or less hyperbolic: a hornet) flies into your face! If I have to find a silver lining, it would have to be the constant scent cover provided by these foul pests. Furthermore, there is a new biting stink bug invasion on the horizon following the spread of a [surprise surprise!] another invasive species. 😦

Similarly, my bees are complete assholes now. Sorry for the language, but there is no getting around it. Understandably, they are in full defensive mode to protect their vital winter stores which is a great and beneficial behavioral habit. However, this also means they shoot at my protected face like bullets and have taken to following me and my truck hundreds of yards away from the hive constantly trying to sting which prevents me from being able to de-suit! Luckily, I really only have to feed them until it gets cold which is not invasive to the hive. Once it gets colder, I’ll put some newspaper in the hive, give them a pile of granulated sugar to munch on, then seal the hive up for the winter and hope for the best until spring.

In the end, I’ll happily take the bad with the good. For the bad, the USDA has put its top minds on the stinkbug issue and has even identified an attractant. In regards to my bees, their defensiveness helps ensure that they can defend the hive from invading robber bees. Plus I have some of my favorite beers to knock back and calm the nerves after the peace of deer hunting is compromised by stink bugs!


Standard
Bees, GIS Planning, Silvopasture and Agroforestry

Trees for Bees 6: GIS Map and honorable mention

Other posts in this series:

Trees for Bees introduction

Trees for Bees 2: Planning

Trees for Bees 3: Sumac

Trees for Bees 4: Sourwood

Trees for Bees 5 : Basswood


You may notice one species mentioned in the first post is absent: Liriodendron tulipifera aka Tulip Poplar.

“Liriodendron tulipifera tulip close” by Dcrjsr – Own work. Licensed under CC BY 3.0 via Commons – https://commons.wikimedia.org/wiki/File:Liriodendron_tulipifera_tulip_close.jpg#/media/File:Liriodendron_tulipifera_tulip_close.jpg

This species is an abundant nectar producer early in the season helping colonies build up food stores and population numbers. While other bee gardeners are full encouraged to consider this tree, it will not be planted on the farm for a few reasons. Tulip poplars require loose, fertile soils as their roots systems are small, fleshy, soft and to put it succinctly: weak. It is also susceptible to numerous pests and diseases. Combining these attributes with its huge form and full sun requirements, the decision was made to plant the more valuable (regarding bees) Basswood in the vacant locations despite the beautiful blooms that resemble tulips, thus the common name.

Final Plans and Map

Putting everything together, there will be sumacs planted on the hill that raises the farm entrance from the pasture as well as below the powerlines. Sourwoods will be planted between the farm entrance track and the main road as well as along the fenceline in the pasture. Lastly, Basswoods will occupy the areas where they have room to spread.

Note: I apologize for the low res imagery. It is used for faster processing as well as the only aerial image saved offline for when I work on maps at the farm where my cellular data is the only access to internet!

That concludes this series…I hope you aren’t sick of bee talk!

Standard
Bees, Silvopasture and Agroforestry

Trees for Bees 5: Tilia americana aka Basswood aka American Linden


Other posts in this series:

Trees for Bees introduction

Trees for Bees 2: Planning

Trees for Bees 3: Sumac

Trees for Bees 4: Sourwood

Trees for Bees 6: Final notes, GIS map and honorable mention (will be published in future)


Where sourwoods produce top notch honey that beats out even clover, there may not be a more prolific nectar producing plant in the eastern United States than Tilia americana as far as volume in concerned. With the limestone parents yielding alkaline soils, it is quite a relief to learn that basswoods prefer neutral to slightly alkaline soils. A major consideration is that these trees need space, and lots of it. Heights of 60-120 feet are commonly achieved while Tilia trees spreads out 50 feet. The bloom is only 2 weeks long between May and July but produces an incredible amount of nectar; the most of any plant native to the eastern US and likely the most heavy producer in all of the United States, though I have found no statistics to confirm this. Furthermore, the flower’s structure protects nectar from being washed away by rain! The last of its attributes to note is how it grows twice as fast as most native hardwoods including beech, oak, and hickory to name the geniuses that make up the most of our native forests here. Unsurprisingly, this also means that it blooms quickly!

With its huge spreading form, basswoods will be planted on either side of the road to the west of the powerline that ends to run underground. Aesthetically speaking, an “Elm Effect” is hoped to be achieved where the trees spread to meet in an arch over the road. Side note, but did you ever wonder why almost every town in the United States has an Elm Street? That arching canopy effect over streets is exactly why but sadly Dutch Elm Disease has killed almost ever American Elm in the US. Not many of these trees will fit on the farm and its ladscape, but if the scarce figures found in literature are true, a few trees should supply a huge surplus!

Standard
Bees, Silvopasture and Agroforestry

Trees for Bees 4: Oxydendrum arboreum aka Sourwood aka Lilies of the Valley tree

Other posts in this series:

Trees for Bees introduction

Trees for Bees 2: Planning

Trees for Bees 3: Sumac

Trees for Bees 5 : Basswood (will be published in future)

Trees for Bees 6: Final notes, GIS map and honorable mention (will be published in future)


From Oregon State University

Sourwood nectar yields one of the most prized honeys on the east coast. Oxydendrum arboreum tolerates shade well but requires acidic soils. It typically forms a cone shaped canopy that is between 25-40 feet tall with a width of 25 feet.  An important note is that these trees are notoriously hard to transplant successfully. If transplanting is successful, sourwoods grow (relatively) very slow so careful consideration of planting sites is prudent. In fact, an arborist I called to the farm for professional advice on an unrelated matter basically told me I was wasting money by trying to grow sourwoods. He was friendly and incredibly knowledgable. Regardless, challenge accepted!

Similarly, the range of the sourwood is shown below:

“Oxydendrum map” by U.S. Geological Survey – Digital representation of “Atlas of United States Trees” by Elbert L. Little, Jr. [1]. Licensed under Public Domain via Commons – https://commons.wikimedia.org/wiki/File:Oxydendrum_map.png#/media/File:Oxydendrum_map.png

Notice how the natural distribution swings around the Shenandoah Valley. “In the Garden: Sourwood” from the nearby Crozet Gazette notes that exact point and speculates that the soil is the limiting factor in this region of Virginia. I would agree, especially noting how the tree grows through the Roanoke and New River Valleys to the south. Geology is what I believe is the differing factor. Where the limestone parent material of the Shenandoah Valley yields alkaline soils, the two valleys to the south are sandstone/shale which produces acidic soils. Moral of the story: it will be a fun challenge as a passionate but amateur botanist and silvoculturalist!

It could be a candidate for under the power lines, but total removal would be needed if it encroaches. Have you ever seen trees under powerlines that commonly get butchered by an untrained “arborist”? It looks like this:

Those epicormic sprouts shooting for the space opened to sunlight by awful pruning practices lead to a never ending battle. Plus removal would waste its slow growth rate and difficult establishment! So for now, it will be planted between the farm entrance road and the fence along the main road where it’s form won’t reach out to disturb vehicles on either. It also could be planted beneath the huge and fast growing basswoods where its slow growth rate would keep them from competing vertically but the different soil requirements make this plan more work than it is worth. Instead, sourwoods will also be planted to form the border of the pasture along the fenceline so bees can maximize the June to July nectar flow.

After seeing the blooms of sourwood for the first time while researching some specifics of this post, I then noticed this specimen in my parents’ neighborhood located in Northern Virginia. I confirmed the identity by tasting the leaf!

IMG_20150908_165202


Standard
Bees

Trees for Bees 3: Rhus genus aka Sumac

Other posts in this series:

Trees for Bees introduction

Trees for Bees 2: Planning

Trees for Bees 4: Sourwood (will be published in future)

Trees for Bees 5 : Basswood (will be published in future)

Trees for Bees 6: Final notes, GIS map and honorable mention (will be published in future)


Sumac’s of the Rhus genus fit the bill perfectly and grow extremely fast. Two species are in contention and neither grows taller than 25 feet and are extremely drought resistant. Sumac’s spread via roots forming thick groves that can commonly be seen along side and in the medians of Virginia’s interstates. This rooting habit has given Rhus shrubs a weedy reputation for landscape gardeners when planted for its incredible red foliage in the fall. Yet it allows the gardener to rejuvenate the stand by mowing it down in the winter stimulating basal shoots that regrow an often thicker grove in the following spring. These shrubs/small trees like sunlight, but can tolerate some shade. Sumac honey is produced from May to August is is well regarded.

Rhus typhina can grow up to 25 feet and forms hairy branches that resemble velvet antlers yielding the common name Staghorn Sumac. Canadian researchers observed that 72% of honeybees worked male flowers for pollen in the morning while 78% gathered nectar in the afternoon. These will be planted on the slope where no overhead power lines exists. The lines on the eastern half of the entrance road limit plantings to shrubs so Rhus glabra will be planted. Smooth Sumac rarely tops out above 15 feet so they will not disturb the power line. If any specimens pose a threat, it can be mowed and the roots will replace it with new shoots.

And just to put any fears to rest, the related poison sumacs can only grow with wet feet meaning they are found in bogs, marshes and wetlands. Most people will never encounter poison sumac as their required habitat is inaccessible by most modes of transportation except a fan boat!

Standard
Bees, Silvopasture and Agroforestry

Trees for Bees 2: Planning

Preface: This series is 7 posts long. As this blog is pretty much my diverse diary of starting a sustainable farming business that attracts readers interested in many different subjects. Thus I will break them up over time so I don’t spend an entire week talking solely about bee trees.

Other posts in this series:

Trees for Bees introduction

Trees for Bees 3: Sumac (will be published in future)

Trees for Bees 4: Sourwood (will be published in future)

Trees for Bees 5 : Basswood (will be published in future)

Trees for Bees 6: Final notes, GIS map and honorable mention (will be published in future)

Having a successful farm enterprise on limited acreage depends on putting every nook and cranny to productive use. There are some areas where fruit trees cannot be grown or cannot be accessed for harvest. Spaces such as these can be put to use with nectar and/or pollen producing trees, both of which come from flowers so it is no surprise that the best producing trees are also quite beautiful. Thus either side of the entrance track is a prime location for planting the bee trees. A challenge is posed on the pasture side of the entrance track by the overhead power line. Fear not, this challenge just adds an extra fun layer into the planning.

That road was constructed on fill dirt that more gradually spans the grade from the lower-lying pasture to the road. The resulting hill on the pasture side of the road has exposed rock and is un-plantable with anything that requires harvesting. I’ve considered leaving it wild and utilizing the hill as a goat exercise pen, but the logistics of fencing such a rocky and steep drop off proved the idea unattainable. However the hostile terrain will not support many trees thus requiring a grove of pioneer species, if anything. There is one pioneer species that produces abundant nectar and pollen and will be the first plant discussed on the morrow.


Standard
Bees

Simple DIY Honeybee Waterer from 2 common items: Cork and bucket

This summer dryness is really affecting the flora and fauna of the farm. My part of the Shenandoah Valley has not had a strong rain since early July. My bees need water like the rest of the plants and animals! Bees need a water source where they won’t drown while drinking. If you are a beekeeper, be a good neighbor and provide your bees with a source of drinking water. Nothing will provoke the wrath of those uneducated about bee behavior quicker than their swimming pools or fountains or birdbaths being constantly full of your bees. I mention uneducated because bees are not aggressive when foraging for resources thus pose little threat unless crushed with bare skin and most people cover their irrational phobias of bees by stating they are allergic when only 1 or 2 people out of 1,000 are actually allergic (Source: USDA). However, those hypothetical neighbors are completely in their rights in wanting to keep bees from congregating in highly trafficked areas.

All that is needed for this project is wine corks and a 5 gallon bucket. Corks are easy to procure even if you don’t drink wine. Restaurants, wine stores, wine tasting events and friends are all potential places that may accumulate wine corks. Mine came from a tent at a wine festival.

Tools required:

None…maybe a wine opener deserves to be included?

Materials:

  • Bucket (You decide the size that is right for you)
  • Wine corks

Procedure:

  • Put wine corks in bucket
  • Fill bucket with water

Alternative Procedure

  • Fill bucket with water
  • Put wine corks in bucket

I jest but this project is incredibly simple. The corks give the bees a place to land and rest while drinking while the bucket holds enough water for quite some time.

Mosquitos suck. I’m anal about standing water on the farm. A zero tolerance policy is in effect. There is literally not a single drop of exposed water on the farm so last week I went on a 3 hour hunt to find the source of the mosquitoes who were biting me one evening. I finally found two tires I was storing behind the barn (to make cement filled mobile fence posts) that had filled with water. When I set out to write this post, I realized I never heard any justification for the oft advised figure of 1 week as the time to replace water to prevent mosquitos. So I researched myself.

After reading various agricultural and etymological sources, I found that mosquitoes can go from egg to adult in 4-14 days depending on the species and conditions. Thus I will strive to change this water every three or four days!

Armed with only anecdotal evidence as most scientific efforts are focused on more important aspects of honeybees, I can tell you that in my observations and many many others on forums and in beekeeping meetings that honeybees tend to flock to stinky water whether it is stagnant or contains some other odor like chlorine. Thus I recommend adding something smelly like essential oils. Without an emulsifier, the oils will not mix into the water and only serve as an attractant. I would not use this technique to deliver anything meant for varroa treatment like wintergreen, spearmint, thyme, lemongrass, etc.

I do however add a small quantity of salt to the water. Up until recently, the published science has only stated that salt lessens the lifespan of bees. However, any beekeeper that has worked in the summer has noticed the bees landing on their skin only to drink the salty sweat. Pools are notorious for luring bees. Now the science is finding that bees have salt taste receptors on their feet and have found this is the reason they are attracted to chlorine salts in pools as well as the newer saltwater pools. Furthermore, they don’t have to even land near the water; those taste receptors can sense it in the air (source: livescience.com). Even more, beekeeping publications like Ross Conrad’s article on Bee Tea in Bee Culture (August 2010) are claiming boosted immune systems of bees from mineral salt. The science has yet to catch up to substantiate these claims.

Beekeeping, like most other fields of agriculture, is incredibly slow to adapt and change. Beekeeping has seen little technological advancement since the advent of the Langstroth hive in 1850. So my decision is to try to stay ahead of the curve in this instance and add 2 teaspoons of salt per gallon to my feeding water.


Standard