Garden

They survived…kinda

All of my non-herbaceous perennials dropped their leaves during a poorly timed dry spell last summer. Of course the first weekend that I could get out there, the rain clouds opened up while I was en route. Last year was a terribly executed attempt at absentee gardening.

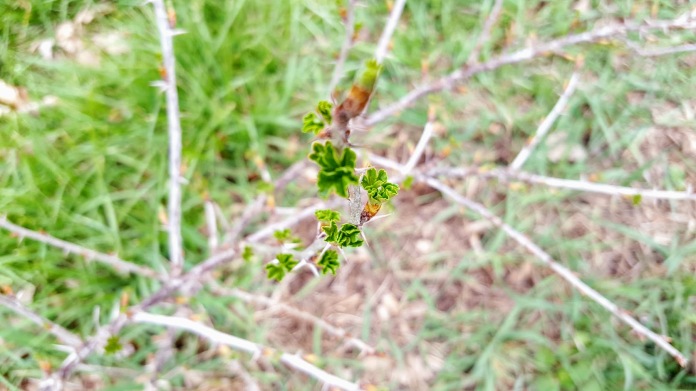
At least the goosberries survived fully which may have something to do with their location receiving the most shade:

One of the raspberries survived as well. Nothing from the blackberries so far.

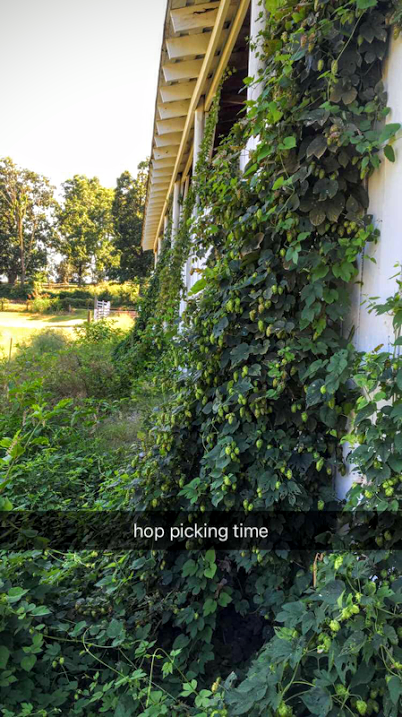
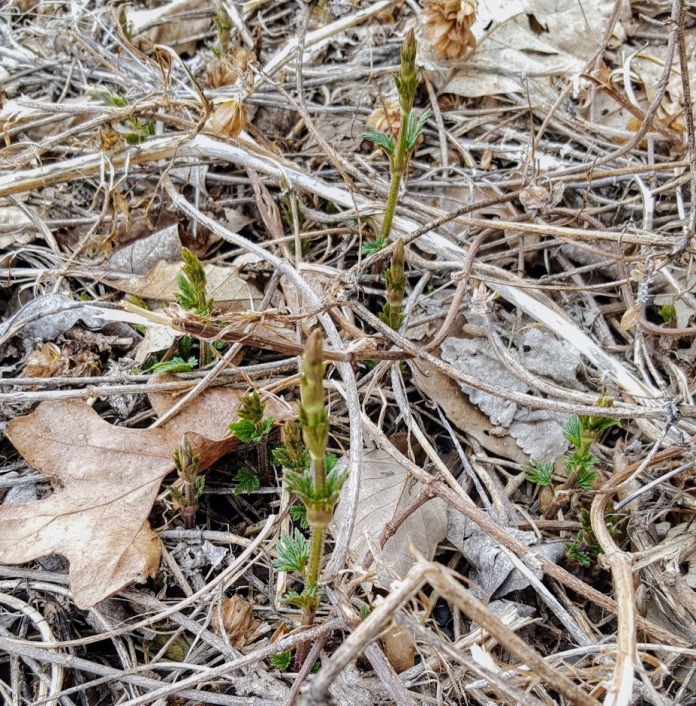
The hops are sprouting out of the soil like the most vigorous asparagus I have ever seen. I’ve read the tender shoots can be harvested and prepared exactly like asparagus:

Asparagus itself shows no sign of life.

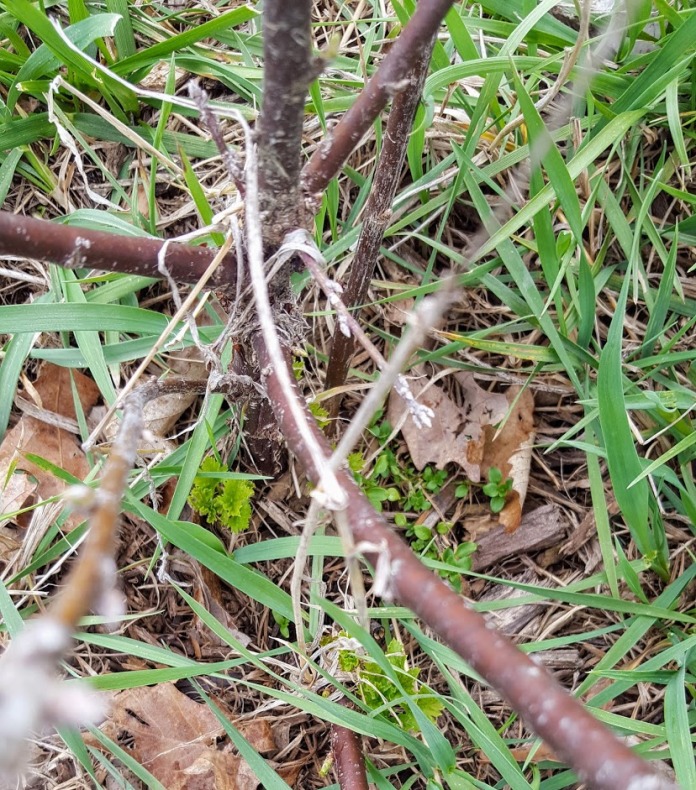
The currants clung to life:

The current currant situation is a great opportunity to nerd out in plant biology in the next post.

Mulberries, filberts, blackberries and grapes are all lifeless currently. The blueberries are in the same state. A thick mat of an unknown, lush sedge (maybe a grass?) that I could not find them until after multiple winter weeding sessions. I believe that lush, unknown sedge has me eating the words published in this exuberant post.

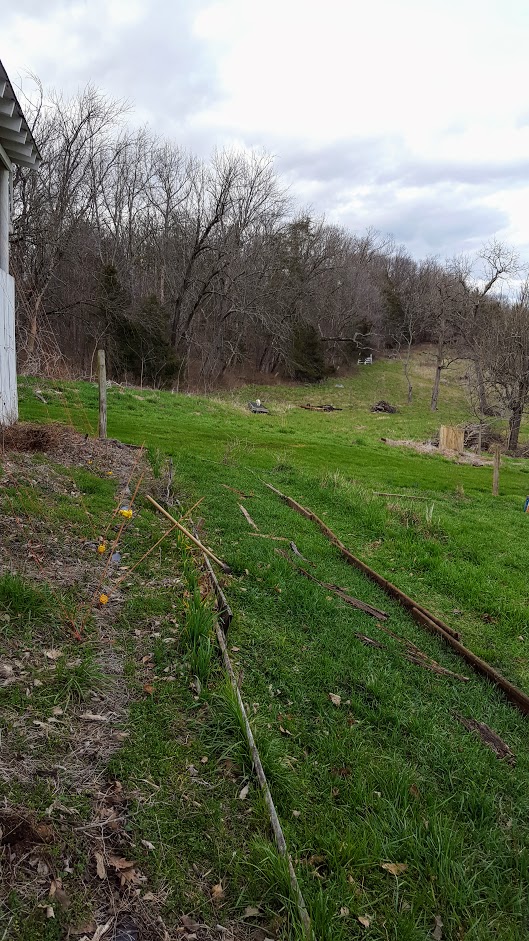
To end on a positive note- Constant winter skirmishes in the war to regain territory lost to the occupant weeds in the previous year of neglect has made the garden beds visible at last:

Standard
Garden

War against weeds – Long overdue update

A campaign was finally launched to regain the ground lost in the garden due to 2 years of neglect. With all of the rain this spring, the garden was overrun by chest-high grasses, weeds and even a few trees consisting of locust, walnut, ailanthus and an elm of some sort. It was in such bad shape that the terraced garden beds could not be located!

Three hours with the weedwacker is what it took to be able to find the original garden beds. Then another 2 hours was spent pulling weeds by hand.

The invasion of one interesting weed seems to have been beneficial. It had a fleshy stem from which many spatulate leaves originated. It formed dense thickets that collapsed into dense mats. Shallow roots allowed single-handed removal of entire mats. The uprooted mass could be rolled into a self-containing bail resembling hay. Some sort of barb scratched the daylights out of skin and caused a mild reaction to the irritation that lasted a few hours. Water content of this plant seemed to be incredibly high as it felt very lush and fleshy, easily bruised but very heavy. They should compost beautifully!

On that note, the massive amount of uprooted plant matter was piled at the end of the garden beds. Or more accurately, the bricks/bails of the aforementioned weed were used in a weird sort of biological masonry. The two purposes of this exercise were providing a marker to locate the garden beds during the next battle as well as to burn out the invading weeds as decomposition produces heat and nitrogen.

Over 3 yards of mulch was used in the garden, to reclaim the boundary mulch bed that contains the grapes and brambles, and to supplement the vacant tree beds created 2 years ago. More grapes and Rubus brambles were added. Five pounds of buckwheat was spread in the garden beds as a biological weapon against re-encroachment of the weeds that were just cut or removed.

Many of those tree beds are no longer vacant!

Those new trees plus a surprising find after completing the cleanup efforts will be in the next posts.

Standard
Garden

Absentee Gardening was more absent than I intended…

Apathy and laziness turned my plans of absentee gardening into a feral patch of land. Installing hops trellises was the last time the garden received any attention whatsoever. Thankfully the individual who mowed the small barn yard area had the foresight to just steer clear of the garden as he did not know the exact locations of the boundary plants. As a result, the grass in the walkways is knee to waist high. I made quite the mess for myself!

Luckily I was able to get some lines in the ground for hops. Otherwise the garden ran wild this year

Luckily I was able to get some lines in the ground for hops. Otherwise the garden ran wild this year

I could blame being busy but the undeniable truth is I just did not make the time to get out to the farm. To be fair to myself, I did make it out for the first scheduled maintenance to find my weedwacker unable to remain running. Blisters and a torso that was sore for a week speaks to my frustrations with having to start the machine so often. After taking it to an expert, I learned it was pretty much shot as too much air was mixing in due to non-replaceable parts wearing with over a decade of use. From then on, I just ignored the problem. Rest in Peace friend (despite requiring a constant battle of having to constantly change line only for it to get stop feeding when it melted together only to run out of fuel when everything was finally working properly).

The major negative points:

  • Pokeweed. Pokeweed everywhere.
  • Ailanthus. Tree of Heaven’s everywhere.
  • Walnuts. Yes…walnut seedlings in the garden. I love walnuts so I may just try and transplant them, but the production of allelopathic juglone in fruit and veggie gardens is concerning.
  • Asparagus are utterly thriving. However it is now apparent that a few of the plants are female despite the nurseries best effort to provide only males. With 47/50 crown survival rate, I’ll still so satisfied with the plants that I am happy to give a recommendation for Nourse Farms.
  • Cascade hops are thriving, centennial are decent, all other are “meh”. No training was done beyond leaving the hops to find the trellises so there are huge ground level mats of hops vegetation which inefficiently consumed large amounts of nitrogen and nutrients. Next year, ruthless pruning will be done.

However a few positives came of my inaction:

  • Where I originally thought invading grasses were knee high in the garden beds, I found most of those were plants from the aisles whose immense weight caused them to lay down over the beds preventing further weed invasions. Similarly, the wild mat of hops growth served the same role.
  • The vast amount of grass clippings created with my borrowed weed wacker gave me plenty of nitrogen and potassium-rich material to pile on the now-unrecognizable boundary bed. The hope here is that the clippings will burn away all the vegetation that has encroached into the mulch.
  • After mowing the aisles I found yet another healthy and happy volunteer pumpkin. I’ve planted exactly zero pumpkins and have had more than 80 successfully grow!
  • I thought a late frost killed my 1 year old mulberry trees, but they rebounded beautifully with nearly full leaf sets. Even the hazelnuts are bouncing back although with much less vigor.

Now that hunting season is back, I have more motivation to go to the farm and generate some fresh content.

As soon as I can get my thoughts written down and organized into a series of posts, I’ll share a hunting trip that was one of the most amazing experiences of my life so far!

Standard
Side Projects

Creating Potash aka Lye aka Potassium Carbonate from Wood Ash

Preface: the same potassium we are after produces an strongly alkaline solution when leeched into water. As a result, the solution is extremely caustic and will react with any living tissues it contacts (remember that scene in Fight Club?). By acting on any information presented in this post, you agree that you have read and understood safe handling requirements (PDF).

Normally I would break this into an easier to digest series of multiple posts. Due to the disclaimer needed regarding safe handling of lye, I chose to keep this as one, long post.

Clarification: Lye refers to Potassium Hydroxide and Sodium Hydroxide as well as Potassium Carbonate. For my purposes, lye refers to any compound of high pH (alkaline aka basic) that are required for soap making or bucking animal hides.

With winter approaching, I explored ways to use the wood ash produced from my catalytic wood stove. At 90% heating efficiency that uses fuel produced only hundreds of yards away, I feel like there is no greener or more environmentally-friendly heating source. As trees decompose, most of the carbon they have banked gets released back into the atmosphere. Granted burning wood does release that carbon instantly back into the atmosphere but might as well use that carbon that will be released anyway through decomposition to produce heat! It also displaces the carbon produced by other heating fuels in refining, processing, pelletization, shipping anywhere much less across oceans and comes from a renewable source that has ceased to sequester carbon (aka died).

Wood from living trees contain many minerals important for plant growth. According to Wood ash in the garden from the Purdue University Department Horticulture and Landscape Architecture, wood ash contains the trace minerals of iron, manganese, boron, copper and zinc as well as some undesirable heavy metals. Nitrogen and sulphur are entirely lost in combustion. The source also mentions that the incredibly fine particle size of wood ash is immediately and completely bioavailable to life in soils.

Potassium is represented by the “K” in the incredibly simplified NPK system of plant macronutrients. Potash that typically makes up 10% of wood ashes can correct acidic soils (known as liming) or potassium deficiencies in gardens. Limestone parent materials mean that my soils are already alkaline, so I use this process to leach out the extremely water soluble potassium compounds. Once extracted with a known pH, a more targeted approach can be executed on individual locations or plants.

Various tree species contain varying degrees of alkaline compounds and plant nutrients. Combustion conditions introduce even more variables into the equation. Leaching the potash instead of direct application of wood ashes to soils allows more control over what is introduced into the soil. Additionally, if alkalinity is the desired attribute, the leeched compounds can be tested then diluted or strengthened as needed.

As with most chemistry applications, distilled water is desired to extract compounds. Luckily the rain cycle is a giant, natural solar distillation process. As such, I save the leeching process to follow a rain to ensure the water is as neutral as possible.

Making a leaching container

I use three cheap, readily available materials to form my leaching barrel: a bucket, a toothpick and an old pillowcase. To source the latter, either retire one from use in your home, pick up one from a thrift store, or buy a cheap new one if needed. Pretty much the same goes for buckets and if you want to recycle materials that would otherwise be wasted, check with restaurants, bakeries, grocery stores, etc. You can buy new ones for about $3 at big box or hardware stores.

Materials and tools needed:

  • 1- 5 gallon bucket
  • 1- Standard pillow case
  • 1- 1/16″ drill bit
  • 1- drill or something to put that 1/16″ hole through the thin plastic wall of the bucket

Procedure:

  • Procure the materials and drill a single hole near the bottom of the bucket on the side wall and use the toothpick as a plug.
  • Line the inside of the bucket with a pillow case. To secure it in place, I just fold the end of the pillow around the bucket like I’m lining a trash can (metaphorical bucket) with a trash bag (metaphorical pillow case). No additional measure are needed, but you could tie it tight with some cordage to ensure the pillowcase does not slide into the bucket when filling.
  • Optional: If you desire very clean, filtered lye for soapmaking, you can add a layer gravel at the bottom of the bucket followed by a layer of straw. Site the drilled hole in the layer of gravel.

Making Potash aka lye aka potassium carbonate

One could calculate how much water to ashes is needed, but with all the variables involved in the production of ash I choose to leech it then adjust the finished product.

Materials Needed:

  • Safe lye handling protective equipment
  • Leaching barrel from above
  • Another bucket to collect the leached solution. Can be considerably smaller
  • Stirring device. I literally use a stick from the woods but anything really will work.
  • Toothpick to plug the hole
  • Spent wood ashes, the whiter the better but we are getting into the realm of micro-optimization
  • A few gallons of rainwater (distilled water can be used in a pinch)
  • pH testing device. I use this litmus paper (affiliate link) which I will discuss in the later.

Procedure:

  1. Wear your lye protective equipment
  2. Use the toothpick as a stopper in the 1/16″ hole. Make sure you don’t knock it out by accident once the bucket is full!
  3. Fill the pillow case-lined bucket with spent wood ashes
  4. Fill the leaching barrel with rain/distilled water. Boiling or hot water helps produce a more complete extraction. The solution might pop, hiss or send up tiny geysers. This is normal so just protect yourself from splashes and wait for it to calm down.
  5. Stir the ash/water mixture. Ashes are incredibly fine thus the water may not penetrate fully without some aggitation.
  6. Let the mixture sit for however long. If you are in a rush, a few hours works. Overnight is better. Days or weeks is best.
  7. Place the catch container under the leaching barrel and remove the toothpick. Again, make sure your hands are protected!
  8. When the leaching barrel is completely empty, test the pH of the solution in the container used to collect it.
  9. Transfer to lye safe containers for storage.

That’s all! If the solution is too alkaline for your purposes, dilute it with more rain/distilled water. If the solution is too weakly alkaline, run it through the next batch of ashes to strengthen it. Remember, pH is logarithmic thus a difference of 1 unit on the pH scale is equal to a factor of 10.

I find it easier to just keep retesting the pH of the solution rather than calculating how much water is needed for dilution. Which brings me to my next point.

Most electronic pH meters I’ve used are pretty awful. They are simply useless when approaching the strongly alkaline side of the pH scale. These cheap litmus papers (affiliate link) on amazon shipped straight from China are the best I have ever used. For less than $3 including shipping for 160 papers, I’ve found no better alternative.

Pictures of leaching process:

Fill the bucket with ashes then fill with (preferably boiling) distilled water.

IMG_20151007_144144 (1)

Above: I make a very half-hearted attempt to skim out the charcoal.

IMG_20151007_144137

Above: Making sure the leaching barrel flows well before plugging it up and waiting.

IMG_20151021_153143

Above: pulling the plug!

IMG_20151021_153147

Allowing the leached solution to drain

IMG_20151021_154443

Above: Dumping the spent ashes into the compost pile


Now all I need to do is test the pH:

IMG_20151021_152832

If I am reading it right, my pH lies between 12-13. Between 11 and 12.9 pH is recommended for my next project, bucking (removing fur) from animal skins, so I will store this solution as is, then dilute it little by little until the desired pH is reached for removing the hair from any deer hides I harvest.

For soap making, I’m going to reluctantly stick to industrial produced lye (affiliate link) just because that process require much more exactness and the appearance of the finished soap may be compromised by my wood ash lye. Plus the low but nonzero potential presence of heavy metals, even if they occur in insignificant amounts, are not something I want to chance in a product I sell to others. Lastly, the Sodium Hydroxide lye I linked produces soap that works with all water types and I have read that soap produced from potassium-based lyes can be ineffective is some water hardnesses.

Storage

When mixing granular lye with water always mix the lye into water, do not pour water into lye. The solution will quickly reach about 200 degrees so glass and plastic containers are not ideal. If capturing an already mixed solution of lye and water, plastic or glass can be used. Lye will also react violently with some metals, particularly aluminum and copper. So if you use any cookware that comes in contact with lye, make sure it is either stainless steel, ceramic or coated with uncompromised enamel.

With that said, it may be in your best interest to store the lye as powder as it takes up less space and is more stable. To get the lye produced above into powder form, the water needs to evaporate out which is usually done by boiling that water off. I have not performed this process, so I cannot provide guidance other than dedicate the pot used for lye purposes only.

I store the lye water in plastic buckets tucked away in a safe place on the ground (so no splashes or spills occur when handled) and label it well. Storing lye or lye water requires common sense applied to safe handling techniques linked in the PDF at the beginning of this post.

Using Your potash or lye

In the Garden:

Like all soil amendment applications of concentrated substances, an accurate soil test should be performed to determine how much the soil should be amended. If liming is needed to raise soil pH, you can accurately calculate the amount of lye water needed if you know both the pH of the lye water as well as the pH of the soil. I dilute the lye water with more water then irrigate the needed sections of the garden like normal.

If using lye water to address potassium deficiencies in soils, I honestly would elect to use compost made of grass clippings in stead. Lye water will raise the soil pH! As long as that is taken into account, wood ashes or lye water can be used with careful monitoring of soil pH.

Making Soap:

Check out my previous post on how to make soap

Bucking Animals Skins (removing hair):

I have not performed this yet. When I do, the process will get its own post and I’ll link to it here!
Standard
Garden

Why I don’t remove broadleaf weeds from my garden

Laziness is certainly partly to blame.

Curiosity is where the remainder of the blame lies. My knowledge of identifying trees and their scientific names is excessive; bordering on obnoxious by the opinions of friends with whom I share outdoor adventures. My skills with identifying herbaceous plants are weak but as I am actively working to improve, each of these plants offers a learning opportunity. So I generally let them go.

Side Note: my skills on identifying grasses are all but nonexistent.

In addition, most of my garden beds are fallow and contain animal manure/bedding. Root action of any kind alleviates my concerns that the beds have not composted enough to be cultivated by next spring. I certainly remove any weeds that interfere with my garden plantings. To be fair, I will probably be less generous to the weeds once my soil is ready to be cultivated fully.

Most broadleaf weeds are annuals thus not presenting much of a threat to the garden. Some of them, like false strawberry, are biennials. However the one thing they have in common is providing nectar and/or pollen to pollinators, both the native and my honeybees. Along these lines, they attract the pollinators to my crops!

This last point can be coupled with the one on curiosity- with my biological approach to farming, any one of those weeds may possess characteristics that make it a valuable tool as I found out with the unexpected Savior from Japanese Beetle Destruction.

Standard
Garden

Persicaria (?spp.?), my Savior weed: organic control Japanese Beetles


The japanese beetles decimated my young grape plants by eating most every leaf in the week I was gone for a wedding. So I set out to find a biological solution to combat these pests.

Chickens and other fowl will eat the larvae from the ground decimating the adult population of beetles preemptively. But this is not much help in my current situation!

Another common solution is good old fashioned hand removal of beetles into a bucket of soapy water. If you have chickens, just drop the beetles into the bucket of water and use them as treats for the chickens once the beetles drown. This has been my course of action.

Beetle traps are not recommended because they attract more beetles from far away leaving the gardener to deal with the beetles widely surrounding the garden instead of only those in close proximity of the garden itself. Plus some research has shown that beetles deploy pheromones to attract others when an individual finds a food source. Certainly not ideal!

Yet I was surprised not to find any documented plants that trap or at least attract japanese beetles away from the harvestable crops. Again, simple observation has proven its power.

This plant has drawn all the beetles in the garden to it. Clearly they are heavily feeding on the leaves and clearly they are making the next generation of beetles atop this plant. Instead of many many beetles on the remaining 10% of my grapes leaves (decimate is to be taken literally both times in this post), there is usually one every few days. This plant is drawing them away from the valuable crops allowing me to focus my soapy water removal strategy on the two places where this plant grows opposed to every grape and hop plant in the garden.

beetleTrap1

I’ve been trying the key this plant and figured out the genus: Persicaria. I will have to wait until it flowers and maybe fruits to find the genus. Needless to say, this plant will be in my garden every year!

Standard
Garden

How to plant Asparagus Organically

Planting asparagus is labor intensive. Or at least it is in my garden beds built on half-century old rocky fill dirt. Additionally, since the holes cannot be refilled for a few weeks, the excess dirt also needs to be stored somewhere. When siting your garden bed, remember that asparagus have a life spanning decades.

I don’t know if I really need this disclaimer, but my farm will not be seeking organic certification due to the immense financial burden that doing so has become. There are also some philosophical reasons from which you will be spared…for now at least. But I hope you agree that my methods fit the bill!

Asparagus needs to be buried deep. Eight inches to be exact but in my case, I dug deeper to remove and rocks that might inhibit root growth. They also need a wide hole in which the crowns can be adequately spread. 12 inches to be exact.

So the procedure is as follows.

Items required:

  • Shovel
    • also a digging iron in my case. Blasted rocks!
  • Asparagus Crowns
    • Nourse farms has by far the highest quality nursery stock that I have come across. However they sell them in 25 crown increments
  • Organic soil amendments
    • I minimize these typically. As the depth required at planting took these plants in to the heavy structured subsoil, I did use a handful of organic manure and humus (NPK- .5:.5:.5) per plant. It was $1.79 per 40 pound bag at walmart. 1 bag was enough for 25 plants.

Procedure:

  1. Eliminate existing weeds or turf to limit competition for nutrients.
    1. This step was taken care of when I built my garden beds using the lasagna method
  2. Dig the planting holes
    1. 8 inches deep, 12 inches in diameter, 12-18 inches apart. I efficiently used geometry (well, trigonometry) to my advantage!
  3. Amend the soil as needed
    1. I put half of a handful of organic manure and humus into the bottom of the hole in a cone shape to better accommodate the form of the crowns.
  4. Place the crown flat in the hole. Roots down, the crown where the roots come together and where the sprouts will originate up. The roots need to be spread out evenly covering the diameter of the hole
  5. Refill the hole ONLY until the crown is buried
    1. One half handful of the organic manure and hummus was placed on top of the crowns, then normal garden soil to finish burying the crown.
  6. Irrigate if needed
  7. When the sprouts are a few feet tall and have become ferns, refill half of the remaining hole.
    1. 100% of my plants had germinated within 10 days
    2. Refilling the hole will generally be 2 or 3 weeks after planting
  8. After another two weeks have passed, refill the holes completely

Here are some pictures of the process:

1. Building the garden bed in a manner that eliminates the turf. Done in the November before the spring planting season:

IMG_20150125_144610

2 and 3. Planting holes dug. Note my soil amendment bag to the left of the frame, bundle of crowns up top.

wpid-img_20150529_170241.jpg


4. Plant the crowns. I am so sorry and I realize this may be the step with the greatest potential for confusion. I failed to photograph it as it absolutely covered my hands in muck. So I am borrowing this image from this planting guide published by the University of Minnesota Extension. Place the crown into the hole so it is in this exact shape:

5. Bury the crown. This image shows the newly germinated shoots so it was taken 6 days after planting. However the depth to bury the crown is accurately depicted:

wpid-wp-1434126160761.jpg


6. Water the plants, no image needed.

7. Refill the hole when the plant has achieved a few feet in height.

wpid-img_20150529_170258.jpg


8. Have not completed this step yet, will update with a picture when I have!


Thats it! After two seasons of unharvested sprouts, you will enjoy 20-50 years of early spring, fresh, nutritious greens harvested before most other plants have come out of winter dormancy!

Standard
Garden

My lasagna method for establishing garden bed without tilling

With incredibly well established crabgrass, killing it organically in order to create garden beds, tree planting sites, etc. seemed like quite a challenge. As time is on my side, I elected to lasagna garden!

The concept is simple.

  1. Existing plants (turf) are mowed down as low as possible.
  2. A biodegradable barrier is put down to smother out the existing turf. I used cardboard as businesses are happy to give it away but brown paper bags and even multiple layers of newspaper are adequate.
  3. Compostable layers are laid down on top of the biodegradable barrier: Anything compostable: mixed nitrogen/carbon (green/brown) material, manure, mulch, etc.

Working simultaneously with the composting materials from step 3, the layer in step two smothers out the established turf before composting both that now dead plant material and the barrier itself. Between the organic matter used in this procedure and what is provided in the roots of the existing, smothered plants, the worm and microbe activity will be exceptionally high yielding quality soil for planting in the following season.

Don’t forget to remove all tape, glue and staples from the cardboard. Also avoid glossy cardboard as it is coated in plastic.

Here are some pictures of my process.

Measuring 6 feet between beds (4 foot bed plus 2 foot aisle). These dimensions are simply my preference. Being 6’4″, there is nowhere I can’t easily reach in a 4 foot bed. Plan your garden beds to your preference!

wpid-img_20150508_121111.jpg


Fill with compostable layers (composting manure in my case) then mulch with whatever you have available to inhibit weed growth. I also planted a cover crop of red clover as an experiment. It seems to be germinating best where the compost is old or where some soil was mixed into the manure compost such as where I excavated to install root barriers in the middle of some garden beds.


wpid-img_20150511_164800.jpg


In retrospect, I can use old pictures to show the process from start to finish!

Lasagna bed being built in November of last year:

IMG_20150125_144610


Asparagus planted into that bed in May. All but the very top layer of manure had composted:

wpid-img_20150529_170241.jpg

3 weeks later in June:

wpid-img_20150529_170258.jpg

I also use this method for establishing flower beds or tree planting sites. Here is a little filbert (hazelnut) seemingly content in his lasagna bed:

wpid-img_20150512_183217.jpg

Standard
Garden, Side Projects

Subterranean Aquaponics? (Brainstorm Session)

Season extension is typically the first step market gardeners take to increase productivity. On my farm, the garden production will be kept simple for the first year but that doesn’t stop brainstorming future innovations.

Aquaponics has always fascinated me. Being a very low input system, the fish feed the plants and can in turn feed me or be processed into fish meal which is the most expensive part of the chicken ration. Chickens can also be directly integrated by using their litter to feed composting worms, which in turn can feed the fish. So if economics ever shifted that placed higher commercial value on tilapia than the chicken, the model can easily be scaled to place fish into the lead role the aquaponics model.

Unfortunately winters here in the Shenandoah Valley, and the rest of Virginia west of the tidewater region, can be harsh. Any economic gain from aquaponics is quickly negated by energy expenditure to provide heat to keep the fish healthy.

Recently, my friend Brauck shared some innovative gardening practices. Plans for a $300 Underground Greenhouse that produces year-round sent the wheels in my head into motion.

The gist of the plans are to dig wide trench 6-8 feet deep in a southern-exposed location, pile the removed earth on the north side of the trench, and seal the trench with transparent greenhouse plastic. A visual representation is pulled from the link above:

Using geothermal energy (thermal mass of the earth) to regulate temperatures while adding trapped solar energy give such potential to this design. Even in winter a tiny solar arrangement could supply power to pumps. If this arrangement provides a stable enough environment while reducing or eliminating energy needed for heat, aquaponics may move from fantasy to viable to profitable.

Standard